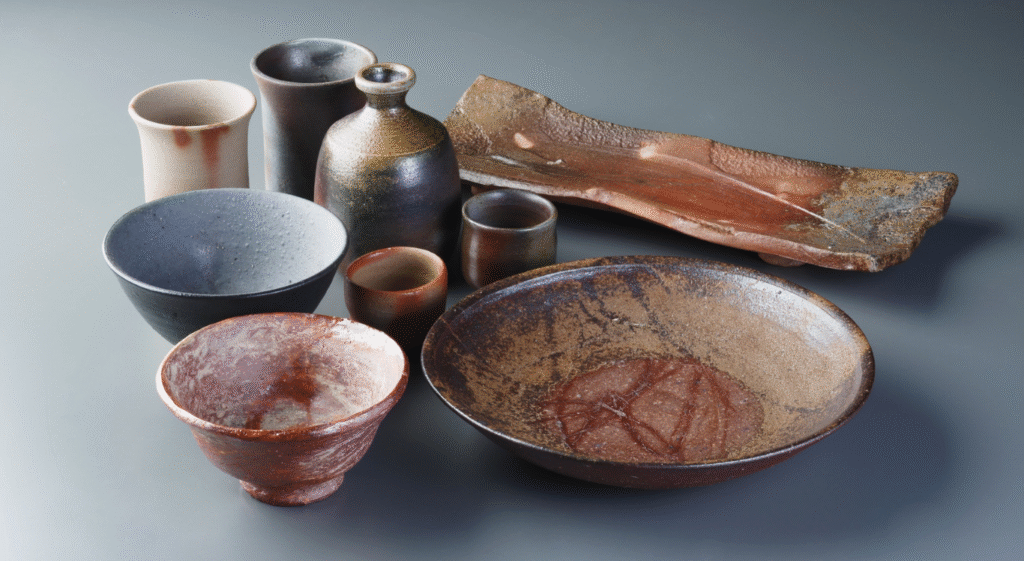
Raku pottery is one of the most fascinating techniques in ceramics because of its unpredictability and beauty. Originating from Japan in the 16th century, this method was traditionally used in tea ceremonies, but today it has spread worldwide as a creative and expressive art form. The process involves removing pottery from the kiln while it is still red hot and then placing it into combustible materials such as sawdust, leaves, or paper. This rapid cooling and reduction atmosphere creates striking metallic effects, smoky textures, and crackle patterns that make every piece unique.
The charm of Raku lies in its element of surprise. No two pieces ever look the same, even if they were made with the same glaze. The fire, smoke, and materials involved all influence the outcome, making each work a true original. For many potters, this unpredictability is part of the joy—it allows them to experiment with different glazes and firing conditions, producing endless variations.
Learning to use Raku glaze recipes helps artists gain a better sense of control while still leaving room for natural surprises. By understanding the ingredients and how they react under heat and reduction, potters can expand their creative expression and craft pieces that reflect their personal style.
Key Ingredients in Raku Glazes
Raku glazes typically use a combination of common ceramic materials, but the results they produce under Raku conditions are far more dramatic. Most recipes begin with a base glaze made from ingredients like feldspar, silica, kaolin, and whiting. To achieve color and effects, metal oxides such as copper, cobalt, or iron are added. These oxides respond dramatically to the reduction process, often turning into vivid metallics or smoky tones.
For example, copper oxide may result in fiery reds or shimmering metallic greens, while cobalt oxide can produce deep blues. The addition of carbonates, such as barium or magnesium, can give the glaze a different texture or sheen. Because Raku involves such fast and extreme changes in temperature, glazes need to be formulated with a little more tolerance for thermal shock.
Another key factor in Raku glaze development is the balance between gloss and matte finishes. Glossy glazes often bring out brighter colors, while matte recipes emphasize texture and depth. Many potters experiment with layering or overlapping glazes to create even more complex effects. Understanding these ingredients helps potters design recipes that give them the kind of finishes they want.
Popular Raku Glaze Recipes
While every studio has its own favorite mixtures, certain Raku glaze recipes have become popular for their reliable yet stunning results. These recipes can be adjusted depending on the desired outcome, but they provide a solid foundation for experimentation. Below is a table of some commonly used Raku glaze recipes with their basic ingredients and results:
| Glaze Name | Key Ingredients (Parts) | Typical Result |
|---|---|---|
| Copper Sand | Feldspar (40), Silica (20), Kaolin (10), Copper Oxide (5) | Metallic greens and fiery reds |
| Crackle White | Feldspar (50), Silica (25), Whiting (15), Kaolin (10) | White glaze with bold black crackles |
| Lustrous Blue | Feldspar (35), Silica (25), Kaolin (15), Cobalt Oxide (3) | Deep blue with shimmering highlights |
| Matte Black | Feldspar (30), Silica (20), Kaolin (20), Iron Oxide (5) | Smoky matte black surface |
These recipes are a starting point. Small adjustments in firing temperature, reduction materials, or the thickness of application can completely transform the results. Potters are encouraged to take notes during each firing, as these records become valuable references for future projects.
Tips for Success with Raku Glazes
Working with Raku glazes can be both thrilling and challenging. Because results vary, it’s important to approach each firing with preparation and patience. One useful tip is to apply glazes evenly but experiment with layering in small sections. Overlapping glazes can produce surprising and beautiful effects, but too much can lead to drips or uneven surfaces.
Timing is also critical. Removing pieces from the kiln at the right moment makes a big difference in the outcome. A slightly longer or shorter firing can completely change the look of a glaze. Equally important is the choice of reduction materials—sawdust often produces soft smoky effects, while newspaper or straw may create sharper contrasts.
Safety should never be overlooked in Raku firing. Since the process involves open flames and combustible materials, protective gear like gloves, goggles, and long sleeves are essential. Proper ventilation is also critical to avoid inhaling smoke or fumes.
Above all, potters should embrace the unpredictable nature of Raku. Even when things don’t go as planned, the results often hold unexpected beauty. The best way to grow is to keep experimenting, documenting changes, and learning from each firing session.
FAQs About Raku Glaze Recipes
Q1: Why do Raku glazes look so different from other glazes?
Raku glazes are exposed to rapid cooling and reduction, which creates unique metallic and crackle effects.
Q2: Can I use the same glaze recipe for both Raku and regular firing?
Not always. Raku glazes are designed for thermal shock and reduction. Regular glaze recipes may not survive the Raku process.
Q3: How do I make stronger crackle patterns in my glaze?
Using recipes with higher silica content and rapid cooling usually produces stronger crackle effects.
Q4: Are Raku glazes food safe?
Generally, no. Raku pottery is decorative, not functional for food or drink, because glazes may contain toxic metals.
Q5: Can I create my own Raku glaze recipes?
Yes, many potters create custom recipes by experimenting with base glazes and adding different oxides or carbonates.