Understanding Homemade Butter’s Shelf Life
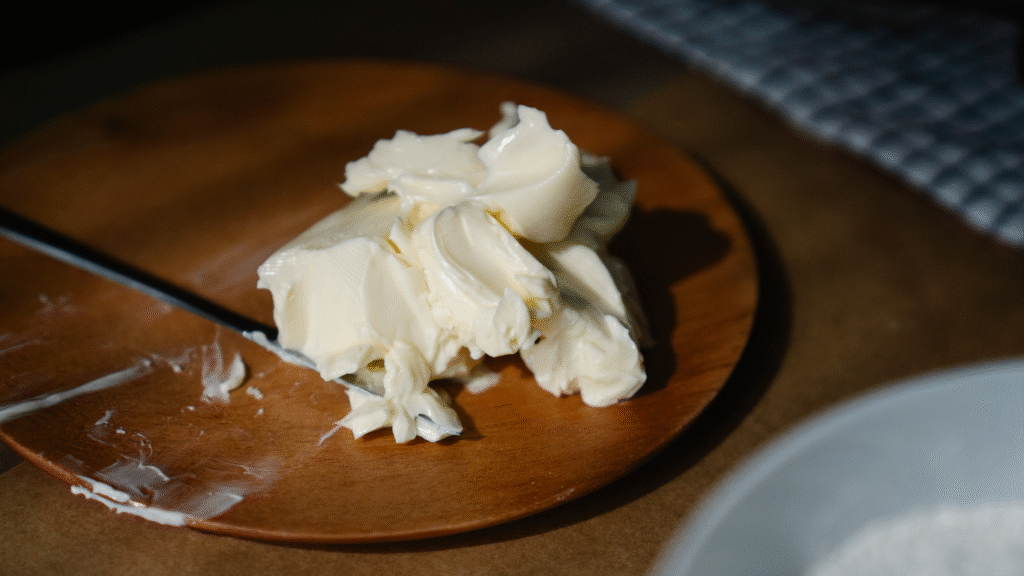
Homemade butter is a treat, but its freshness depends on a few key factors. Unsalted butter, made from just cream, typically lasts about one month in the fridge, according to some studies. Adding salt not only boosts flavor but also acts as a natural preservative, extending shelf life to around three months. If you freeze it, both types can stay good for six months or even a year if stored properly. The absence of preservatives, unlike store-bought butter, makes proper storage crucial. Temperature, air exposure, and whether you’ve added salt all play a role. For example, leaving butter at room temperature for too long can make it go rancid faster. Knowing these basics helps you plan how much to make and how to store it, ensuring you enjoy every creamy bite without waste.
Salted vs. Unsalted Butter
Salted homemade butter lasts longer because salt slows bacterial growth. The Kitchn notes that unsalted butter stays fresh for about 4 weeks in the fridge, while salted can last 12 weeks. Salted butter also holds up better at room temperature for short periods, making it great for daily use.
Factors Affecting Shelf Life
How you handle and store butter matters. Exposure to air, heat, or improper containers can speed up spoilage. Using clean utensils and keeping butter in a sealed container helps. Per Food52, even a small amount of water left from rinsing homemade butter can cause it to spoil faster, so thorough straining is key.
Proper Storage Tips
Storing homemade butter the right way is the secret to keeping it fresh. Keep it in the fridge at 35–40°F, ideally in an airtight container or wrapped tightly in wax paper or plastic wrap to block air and odors. Serious Eats suggests storing it in the back of the fridge, where it’s coldest. For short-term use, a butter dish works if you eat it within a day or two, but only for salted butter. Freezing is a game-changer for longer storage—wrap it tightly in foil or a freezer bag to prevent freezer burn. Label with the date to track freshness. These simple steps ensure your butter stays creamy and delicious for as long as possible.
Refrigeration Best Practices
Store homemade butter in an airtight container or wrap it tightly to avoid absorbing fridge odors. Place it in the coldest part, not the door, where temperatures fluctuate. A ceramic butter crock or glass jar works well. The Kitchn recommends checking the seal to keep air out, preserving flavor and texture.
Freezing for Long-Term Storage
Freezing extends homemade butter’s life to 6–12 months. Cut it into small portions, wrap each in wax paper, then place in a freezer bag to prevent burn. Label with the date to avoid confusion. Serious Eats advises thawing only what you need in the fridge overnight to maintain its creamy consistency.
Signs Your Butter Has Gone Bad
Nobody wants to spread spoiled butter on their toast. Luckily, it’s easy to spot when homemade butter goes bad. A sour or rancid smell is the first clue—fresh butter smells creamy, not sharp. Look for changes in color, like yellowing or dark spots, or a slimy texture. Taste a tiny bit if you’re unsure; spoiled butter has an off, bitter flavor. Mold is a clear sign to toss it, though it’s rare if stored properly. According to Food52, rancidity happens when butter oxidizes from air exposure, so proper storage is key. If you notice any of these signs, don’t risk eating—“when in doubt, throw it out,” as the saying goes.
Visual and Smell Cues
Check for a rancid or sour smell, which is stronger than fresh butter’s mild scent. Visually, look for uneven yellowing or green-gray patches. The surface might feel sticky or slimy. Serious Eats notes that these changes often start at the edges, so inspect closely before using.
Taste and Texture Changes
If the smell and look seem okay, a small taste can confirm. Spoiled butter tastes sharp or bitter, not rich and creamy. The texture may feel grainy or oily. The Kitchn warns that even slight off-flavors mean it’s time to discard the butter to avoid ruining your dish.
How to Make Homemade Butter Last Longer
To stretch your homemade butter’s shelf life, a few tricks can make a big difference. Adding salt during the churning process is a simple way to extend freshness, as salt inhibits bacteria. Thoroughly rinse the butter after churning to remove buttermilk, which can spoil quickly, per Serious Eats. Store in small batches to avoid opening and exposing the whole batch to air. Freezing portions you won’t use soon is another smart move. Using clean utensils every time you scoop prevents contamination. These steps, rooted in traditional butter-making wisdom, help you enjoy your homemade creation for weeks or even months longer.
Adding Salt for Preservation
Mixing in ½ teaspoon of salt per pound of butter during churning can triple its fridge life. Food52 suggests using fine sea salt for even distribution. This not only preserves but also adds flavor, making it ideal for spreading or cooking without extra seasoning.
Rinsing and Straining
After churning, rinse the butter in cold water until the liquid runs clear to remove buttermilk, which spoils fast. Strain thoroughly using cheesecloth or a fine mesh sieve. Serious Eats emphasizes that leftover moisture can lead to mold or rancidity, so don’t skip this step.
Making Homemade Butter
Making your own butter is simple and rewarding, and it starts with just heavy cream. Pour 2 cups of heavy cream into a mixer or jar and whip or shake until it separates into butter and buttermilk—about 10–15 minutes. Rinse the butter solids in cold water, knead to remove excess liquid, and add salt if desired. This recipe, inspired by The Kitchn, yields about 1 cup of butter. Knowing how to make it fresh helps you control quality and plan storage, ensuring you get the most out of your homemade butter.
Basic Recipe
Use 2 cups heavy cream (35% fat) and a stand mixer, food processor, or jar. Whip on medium-high or shake vigorously until the cream splits into butter and buttermilk. Drain the buttermilk, rinse the butter under cold water, and knead until smooth. Add ¼ teaspoon salt for salted butter, if desired.
Tools Needed
You don’t need fancy equipment. A stand mixer with a whisk attachment or a food processor speeds things up. A jar works for shaking by hand, though it takes effort. Cheesecloth or a fine sieve is essential for straining. Serious Eats recommends a bowl of ice water for rinsing to keep butter firm.
Using Homemade Butter Before It Spoils
Homemade butter’s rich flavor shines in countless dishes, so use it up while it’s fresh. Spread it on warm bread or muffins for a simple treat. Use it in baking for flaky biscuits or cookies, as The Kitchn suggests, or melt it over popcorn for a gourmet twist. Try making compound butter by mixing in herbs, garlic, or honey for extra flair. If you’ve made too much, share it with friends or freeze it in small portions. These ideas ensure you enjoy every bit of your butter before it nears its shelf life limit.
Cooking and Baking Ideas
Use homemade butter in recipes like shortbread cookies or mashed potatoes for a rich, creamy flavor. Melt it for sautéing vegetables or drizzle over grilled corn. Food52 suggests browning it for a nutty taste in sauces or pasta, making your dishes extra special.
Making Compound Butter
Mix softened butter with ingredients like minced garlic, parsley, or lemon zest for a flavored spread. Roll into a log, wrap in wax paper, and chill. Serious Eats recommends herb butter for steak or honey butter for cornbread, adding versatility to your homemade creation.
Common Mistakes to Avoid
Making and storing homemade butter is straightforward, but small mistakes can cut its shelf life. Not rinsing out all the buttermilk leads to faster spoilage, as does storing in a warm spot like near the stove. Using dirty utensils introduces bacteria, per Food52. Don’t leave butter out too long—salted butter can sit at room temperature for a day or two, but unsalted shouldn’t. Avoid loosely wrapped storage; air exposure causes rancidity. By sidestepping these errors, you’ll keep your butter fresh and tasty for longer.
Improper Storage
Storing butter in a non-airtight container or the fridge door, where it’s warmer, speeds up spoilage. Use a sealed jar or wrap tightly in wax paper. Serious Eats warns that exposure to air or strong-smelling foods like onions can taint the butter’s flavor quickly.
Contamination Risks
Always use clean utensils to scoop butter. A dirty knife or spoon can introduce bacteria, causing mold or off-flavors. The Kitchn advises keeping your hands clean and avoiding double-dipping utensils in the butter to maintain its freshness and prevent early spoilage.
Enjoying Your Homemade Butter
Homemade butter is a labor of love, and with proper care, it can stay fresh and delicious for weeks or months. Whether you’re slathering it on toast, baking with it, or gifting it to friends, its rich taste is worth the effort. By salting it, storing it right, and using it creatively, you can make the most of every batch. If you’re worried about it spoiling, freeze portions or whip up some baked goods to share. With these tips, inspired by trusted sources like Serious Eats and The Kitchn, your homemade butter will bring joy to your table for as long as possible.
Sharing with Friends
Homemade butter makes a thoughtful gift. Package it in small jars with a ribbon and a recipe card for biscuits or scones. Food52 suggests gifting compound butters for special occasions, spreading the love of your homemade creation while using it up.
Freezing Leftovers
If you’ve made too much, freeze extra butter in ¼-cup portions for easy use later. Wrap tightly in wax paper, then place in a freezer bag. The Kitchn notes that frozen butter is perfect for baking or cooking, keeping its fresh flavor for up to a year.


