Building an iOS app can start as a small idea in a garage and grow into a global success. Think of apps like Instagram or WhatsApp—both began with a spark and a few dedicated people. Today, the iOS platform powers millions of apps, reaching billions of users through iPhones and iPads. Developing an app takes passion, planning, and the right tools, but anyone with a vision can turn it into reality. This article explores how to take an iOS app from a simple idea to a worldwide hit, covering the steps, challenges, and strategies to succeed in the competitive App Store.
1. Start with a Great Idea
Every successful app begins with a clear idea that solves a problem or fills a need. Maybe it’s a game that hooks players or a tool that simplifies daily tasks. Your idea doesn’t need to be complex, but it should be unique or better than what’s out there. Research the App Store to see what’s popular and where gaps exist. Talk to potential users to understand their needs. A strong idea sets the foundation for everything else.
Brainstorm and Research
Grab a notebook and jot down ideas that excite you. Think about problems you face daily—could an app solve them? Check the App Store for similar apps and read user reviews to spot weaknesses. For example, if you’re building a fitness app, see what users dislike about existing ones. This helps you create something people actually want.
Validate Your Idea
Before coding, test your idea with friends, family, or online communities. Create a simple survey or mockup to share. If people show interest, you’re on the right track. Tools like Figma let you sketch basic designs to visualize your app. Validation ensures you don’t waste time on an idea that won’t connect with users.
2. Learn the Basics of iOS Development
You don’t need to be a coding expert to start, but learning the basics is key. Apple’s tools, like Xcode and Swift, make iOS development accessible. Swift is the programming language for iOS apps, and Xcode is the software where you build and test them. Start with free online tutorials or affordable courses to get comfortable. With time, you’ll turn your idea into a working app.
Master Swift
Swift is Apple’s user-friendly language for iOS apps. It’s powerful yet easier to learn than older languages. Start with Apple’s free “Swift Playgrounds” or online courses on Udemy or Coursera. Practice by building small projects, like a to-do list app. Understanding Swift lets you create smooth, responsive apps that users love.
Get Familiar with Xcode
Xcode is where you’ll write code, design interfaces, and test your app. It’s free on the Mac App Store and includes tools to simulate how your app runs on an iPhone. Watch YouTube tutorials to learn Xcode’s features, like the Interface Builder. Spending time with Xcode early helps you avoid headaches later.
3. Design a User-Friendly App
A great app isn’t just about code—it’s about how it feels to use. iOS users expect apps that look clean and work smoothly. Focus on simple, intuitive designs that make tasks easy. Apple’s Human Interface Guidelines offer tips on creating apps that feel native to iOS. Good design keeps users coming back.
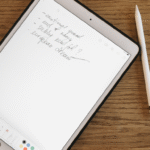
Prioritize Simplicity
Keep your app’s design clean and uncluttered. Avoid cramming too many features into one screen. For example, a note-taking app should make writing and organizing notes effortless. Use tools like Sketch or Figma to create prototypes. Test your design with friends to ensure it’s easy to navigate.
Follow Apple’s Guidelines
Apple’s Human Interface Guidelines explain how to design apps that match iOS’s look and feel. Use standard buttons, fonts, and layouts so your app feels familiar to users. For instance, place navigation bars at the top or bottom for easy access. Following these rules also improves your chances of App Store approval.
4. Build and Test Your App
Once you have a design and some coding skills, it’s time to build your app. Start with a minimum viable product (MVP)—a basic version with core features. Test it often to catch bugs early. Use Xcode’s simulator to see how your app runs on different iPhones and iPads. Testing ensures your app is reliable before it reaches users.
Create an MVP
An MVP includes only the essential features your app needs to work. For a ride-sharing app, that might be booking a ride and tracking the driver. Build this first, then add extras like payment options later. An MVP lets you launch faster and get user feedback to improve the app.
Test Thoroughly
Test your app on various devices using Xcode’s simulator or real iPhones if possible. Check for crashes, slow performance, or confusing features. Ask friends to try it and share honest feedback. Fix issues before submitting to the App Store to avoid rejection and bad reviews.
5. Launch on the App Store
Getting your app on the App Store is a big milestone. Apple’s submission process is strict, so prepare carefully. You’ll need an Apple Developer account ($99/year) and follow App Store guidelines. A polished app with no bugs has a better chance of approval. Once live, your app can reach millions of users worldwide.
Prepare for Submission
Create an Apple Developer account and fill out your app’s details, like its name, description, and screenshots. Write a clear description that explains what your app does and why it’s useful. Use high-quality screenshots to show off key features. Double-check that your app meets Apple’s rules to avoid rejection.
Optimize for Discovery
App Store Optimization (ASO) helps users find your app. Use relevant keywords in your app’s title and description, like “fitness tracker” for a workout app. Choose an eye-catching icon and include a demo video. Good ASO boosts your app’s visibility and downloads.
6. Market Your App Globally
A great app won’t succeed without marketing. Spread the word through social media, blogs, and word-of-mouth. Reach out to influencers or tech bloggers to review your app. Offer a free version or trial to attract users. Smart marketing turns your garage project into a global hit.
Use Social Media
Share your app on platforms like Twitter, Instagram, and TikTok. Post short videos showing how it works or share user testimonials. Engage with followers by answering questions and sharing updates. Social media is a free way to reach a huge audience and build excitement.
Reach Out to Influencers
Contact bloggers, YouTubers, or influencers in your app’s niche. For example, a gaming app could target gaming YouTubers. Offer them free access to your app for an honest review. Their audiences can drive downloads and give your app credibility.
7. Scale and Improve Your App
After launching, your work isn’t done. Listen to user feedback and release updates to fix bugs or add features. Scaling your app means reaching more users and keeping them happy. Analyze data to see what works and what doesn’t. Continuous improvement keeps your app relevant.
Listen to Feedback
Read App Store reviews and user emails to understand what people love or hate about your app. If users complain about crashes, prioritize fixing them. If they want new features, consider adding them in updates. Responding to feedback shows users you care and builds loyalty.
Analyze and Update
Use tools like App Store Connect to track downloads, user behavior, and crashes. If many users drop off at a certain feature, it might need a redesign. Release regular updates to keep your app fresh and compatible with new iOS versions. Updates show users your app is active and improving.
Conclusion
Turning an iOS app from a garage idea to a global success is challenging but achievable. Start with a solid idea, learn Swift and Xcode, and design a user-friendly app. Build and test carefully, launch on the App Store, and market it smartly. Keep improving based on user feedback to stay competitive. With dedication, your app could be the next big thing, reaching millions and making a real impact.